
Click the right hand side box to enter "Quick Mask Mode"
A quick note about "Quick Mask". The default color it displays is red. If you're trying to mask a red item, this can be a little difficult (as you can't see what you've done). Double click on the "Quick Mask Mode" button to get the following dialog box:
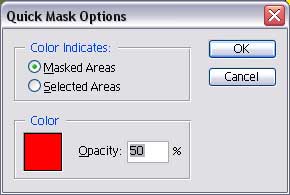
From here, you can double click on the color square and pick a different color.
Lets start masking!
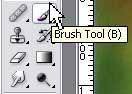
Select the paint brush tool from the tool pallet. Set the size of the brush to whatever you'd like it to be, and start painting on all the parts you want to keep (hint: this is easier if you turn on the "Cap Lock" button, as it displays the actual size of the brush as a circle).
Here we've painted over some of the parts we want to keep. Keep going until you've got everything you want panted! (Hint: Sometimes it's easier if you zoom in. You'll also probobly want to adjust the size of your brush for the finer details).

If you paint too much, you can use the eraser tool to remove the extra.
You're almost done!!
[Page 1] [Page 3]